

Growing up in the Middle East where cooking with herbs or having fresh herbs served with every dish is a tradition long-lived and might be one of the many reasons I love herbs. I always have herbs around the kitchen and use them in almost every dish. Besides the amazing flavors that herbs bring to the table, there are many health benefits that come with them too.
Here in Chicago we only have a small window of time to grow plants outside. As herb lover, I start planting my garden with the first sign of spring. I have a small balcony with planter boxes where I try to get the maximum use out of them. This is where I grow basic kitchen herbs and vegetables, plus a few flowers here and there for the bees and butterflies that come to visit often.

As much as I would like to keep the mini garden going the whole 12 months of the year it’s not possible, so I try to store as many herbs as I can for future days in winter. Every once in a while, I do what I call a mini-harvest. As shown below, I cut as many herb as possible out of the garden and store them as they come. This way I will not be overwhelmed by the end of the season and also I get more herbs because cutting them encourages more growth.

Although nothing comes close to the flavor of fresh herbs, freezing or drying them still can be close enough. Keep in mind by no means I am a herb expert or a master chef, but I have found these methods work good for me and my busy lifestyle.
Washing & Drying Herbs:
You need to wash and dry the herbs before using any of the methods below. I do love to use my salad spinner for this part. I fill up the bowl with water while the strainer and the herbs are inside. After 5 minutes or so the dirt will settle in the bottom of bowl. Carefully, without disturbing the water, I grab the strainer out. Then I empty the water out of bowl, spin the bowl a few times, and the herbs are pretty washed and dried. You can use the same system with a simple bowl and strainer and then dry the herbs thoroughly with a paper towel.
If the herb is not dried well enough after washing, it will mold during air drying. Just to be extra safe I spread the herbs on a clean kitchen towel on a flat surface for 10 minutes or so after washing and drying.
Drying Herbs
Herbs can fall into two categories: high-moisture and low-moisture herbs.
Basil, tarragon, lemon balm and mint have high moisture content and will mold if not dried quickly. They dry the best in an oven or a dehumidifier.
Sage, thyme, dill, bay leaves, oregano, rosemary and marjoram are sturdy, low-moisture herbs that are best suited for air-drying.

Air Dry:
- Wash and dry herbs as mentioned above.
- Grab a few branches and tie them at the end with an elastic band, twist tie, twine, string or ribbons. Keep in mind that the high moisture herbs should be gathered with fewer branches.
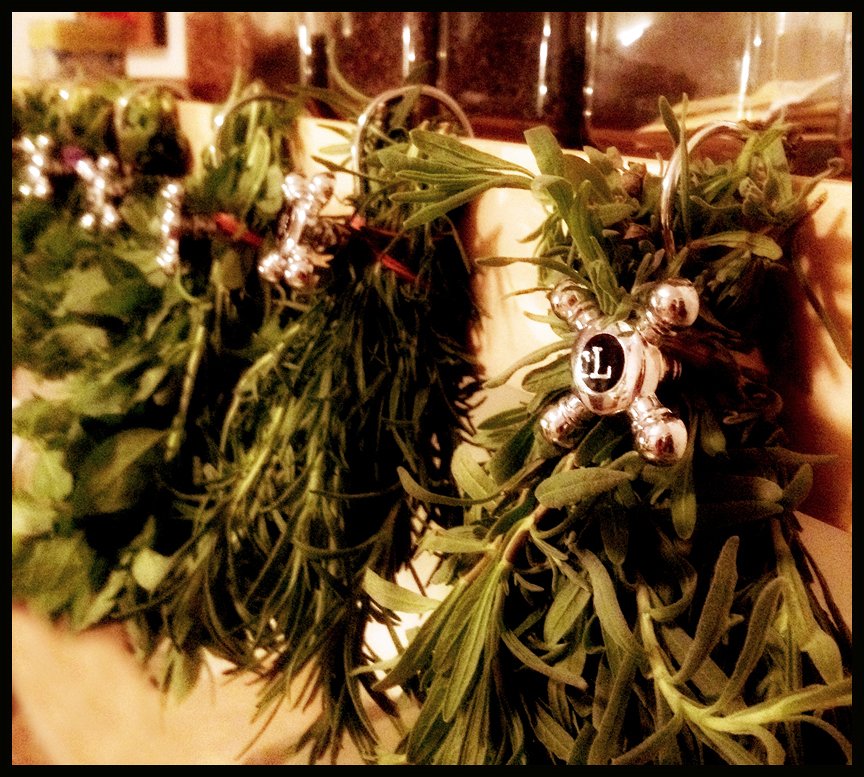
- Hang the bunched up herbs upside down to dry. Some suggest hanging it upside down loose inside a brown paper bag to keep the flavor. But that was too much effort for me, plus I like the natural fun look that hung herbs give to my kitchen. You can hang them from a nail or any creative way you can think of.
- I had these shower curtain hooks around the house, so I used them to hang the herbs (pictured below). You can hang them from a shelf or use an eye-hook and hang them from the wall. Any hook such as an S Hook can do the same.
- Many herbs look different dried than they do fresh. It’s easier if you label them. In my case, I used letters to label the hook with the first letter of herb’s name.
- After the herbs dry for a few weeks, remove any stems, crush them with your hand, a mortar and pestle or a food processor.
- Store the leaves in airtight, labeled glass jars away from the sun in a dry space like your cabinet.

Oven Dry:
- Follow the above steps on washing and drying the herbs.
- Spread the herbs on a cooking sheet.
- Turn the oven on to “warm” (140 to 200 F) (or 65 degrees C to 93 degrees C, gas mark 1) for 20 minutes, then turn it off and pop in the herbs. Make sure the oven is not too hot which will result in killing the flavor of the herb.
- Store dried herbs in airtight, labeled glass jars away from the sun in a dry space like your cabinet.

Freezing the Herbs:
- Wash and dry the herbs as mentioned above.
- Put the herbs inside a plastic bag and get as much of the air out as possible. Most of the time, I gather all of the herbs in their own individual plastic baggies and then store all of them in a bigger plastic baggie to lower the risk of freezer burn.
- Label the bags with name of the herb and the date.
- Put the bags in the freezer.
- After 3-4 weeks take the bag out of freezer, press over the bag with your hand or rolling pin. The frozen leaf should fall of the stem. This part depends on the use you have in mind for the herb. For example, I use rosemary as a whole so there is no need to separate the leaves from stem.
- Store the leaves inside an airtight, labeled glass jar in the back of the freezer.

If a recipe calls for dried herbs, you can use frozen ones instead, just double the amount of herbs required in the recipe.
To store in the fridge:
- Wash and dry the herbs as detailed above.
- Wrap them in a paper towel and place inside a plastic bag.
- Store them in the fridge. This way you can keep the herbs fresh for a week or so. You can also use one of these herb keepers in the fridge.
I hope you got some use out of this blog post. Since I am always searching for easy and new ways to keep the flavor of my garden around even in the winter, please share your ideas on how you store your herbs.
You also might be interested in this post: Splash of green
Bahar Partow
Co-Founder, Mission 2 Organize